
My favorite candy in the whole world is a good caramel. Which is why, for thirty years, I have been making them every holiday season to give to people I care about.
Over the decades, I have tried a lot of different recipes, but I always seem to return to a version I first found in the 1948 version of “The Settlement Cookbook” by Mrs. Simon Kander (the first edition was published in 1901).
Mrs. Kander was a woman whose life’s work was to help young, female Jewish refugees become assimilated in the United States. We all have to eat, she figured, and food and cooking was the way she taught her charges to live in America.
So here is my take on Mrs. Kander’s caramel recipe, finessed over the years. Her mission is still right on target. Those who eat together, can live together.
The biggest change in my version of her recipe has been to come up with a tag-along recipe, one that uses up the dregs in the caramel cooking pot. You see, if the pot is scraped to get the last little bit of caramel out of it, the results are usually disastrous. Those dregs crystallize, and then the whole batch of caramels crystallizes. Oy, as Mrs. Kander would say.
So resist, people! Do not scrape. Instead, throw those dregs back on the stove with some cream and flavoring, and harvest a bonus recipe of caramel sauce. The following is flavored with coffee, vanilla and brandy or rum, but you can make up your own variation. Whatever you do, it will be great on ice cream.
And if you want to dip these caramels in chocolate, have a look at my post on tempering chocolate for dipping candy centers.
If not, simply wrap the cut caramels in parchment or wax paper, or any other candy wrapper you choose. They will keep for weeks at cool room temperature, so if you make too many for this Thanksgiving, they will still taste pretty good come Christmas.
Caramel Candy and Bonus Coffee Caramel Sauce
For the Caramel Candy:
2 cups white sugar
2 cups corn syrup
3 cups cups heavy cream
¼ cup unsalted butter (plus a little more for buttering the pan)
1 teaspoon fine sea salt
2 tablespoons vanilla
an instant read thermometer
an 8 inch square pan
parchment paper
For the Bonus Coffee Caramel Sauce
the leftover caramel at the bottom of the pot
1 cup heavy cream
1 teaspoon instant espresso
1 tablespoon vanilla
1 tablespoon cognac or rum
To Make the Caramel Candy:
Grease the bottom and sides of the 8 inch pan with a little butter. Cut parchment paper to line the bottom and sides of the pan, place the paper in the pan, and grease the paper with a little more butter. Set aside.
Combine 2 tablespoons of vanilla and the salt in a small bowl or cup and set aside.
Place the sugar, corn syrup and one cup of the heavy cream in a large, heavy pot; this pot should be wide and shallow but large enough to accommodate the alarming bubbling up of the cooking caramel without over-flowing. I use a double clad eight quart stock pot.

sugar, corn syrup and cream boiling to make caramel
Stir the ingredients together and place over medium heat. Bring to a rolling simmer, stirring often and being careful to make sure the pot doesn’t boil over and that the caramel doesn’t burn on the bottom.
When the mixture reaches a temperature of around 236 degrees, add one more cup of heavy cream, stir well, and continue the rolling simmer.
When the mixture reaches 236 degrees again, add 1 more cup of heavy cream and bring to a rolling simmer again.
When the mixture reaches 230 degrees, stir in the butter, combining until it is completely melted. Keep the mixture boiling, being careful it doesn’t burn on the bottom.
Keep a close eye on the thermometer as the temperature rises into the low 240s; be ready to take the pot off the heat the moment it reaches 245 degrees. The caramel’s temperature will continue to rise, and can get as high as 250, but anticipation is key. Much past 250, the caramel will be too hard, so watch the pot!
As soon as the mixture reaches 245 degrees, take it off the burner and stir in the vanilla and salt, then immediately pour the mixture into the prepared pan. When you get to the dregs at the bottom of the pot, stop pouring and place the pot back on the stove.
DO NOT SCRAPE THE POT. Scraping will cause crystallization, and any tiny bit of crystallization that is introduced into the hardening caramel will cause the whole batch to crystallize over the next few days. In which case, it will still be edible, but not nearly as good.
Set the pan of cooling caramel in a dry, cool spot. If making the Coffee Caramel Sauce, this is the moment to head back to the stove. Otherwise, fill the dirty pot with water and let it soak.
At this point, you have at least twelve hours to kill before the caramels are ready to cut. Go binge-watch Netflix. However if, while binge-watching Netflix, you decide you can’t wait to try your caramels, as soon as the candy is cool enough not to remove skin on contact, you can scoop out a taste with a spoon from the corner. The remaining caramel will flow into the hole by the time you are ready to cut for real.
When the caramels are completely cool and set (12-24 hours after they hit the 8 inch pan in liquid form), they can be cut into pieces. Remember, though, that caramel is essentially a liquid in slow motion. Once cut, the individual pieces will melt and stick together if they are not contained inside a chocolate coating or a wrapper.
So before cutting, know whether you are going to: 1) dip them in chocolate, and/or 2) store them in candy wrappers, and be prepared with whatever is needed for the next step.
And if you can’t decide which way to go or don’t have the necessaries, don’t sweat it. The pan of caramels will keep for days at a cool room temperature, so you have lots of time to decide.
When you are ready to cut for real, be sure to have a very large, sharp knife on hand as well as a big cutting board that doesn’t smell like onions. A ruler is good if you love symmetry. Proceed as follows.
Using the parchment paper, lift the caramel out of the pan and place it on the cutting board. Cut the caramels into even-sized pieces according to your preference. These can range from bar-sized pieces (1 inch by 3 inches, say) to small pieces ½ inch x ½ inch.

cut caramels ready to dip or wrap
Once cut, the caramels may be dipped in tempered chocolate, or wrapped in waxed or parchment paper. Don’t freeze or refrigerate caramels, no matter how they have been treated. Cooling will cause the caramels to absorb moisture and lose freshness. So long as all the ingredients used in the recipe were at their use-by dates, the caramels will keep well for a month at a cool room temperature.
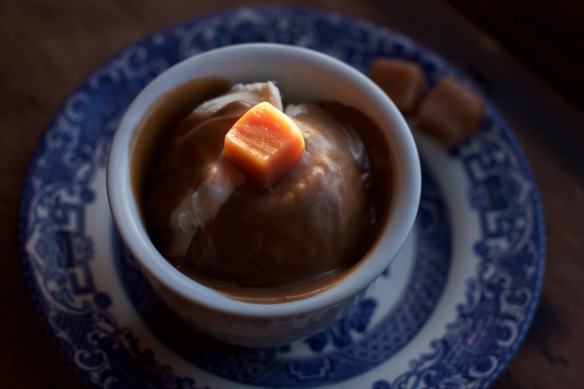
Caramel and Caramel Coffee Sauce on ice cream
To make the Coffee-Caramel Sauce
Pour 1 cup of heavy cream into the pot with the dregs of the caramel in it and place the pot over medium-low heat.
Stir well, scraping up the bits of caramel so they melt into the warming cream. When the caramel has dissolved pretty well into the cream, add the espresso powder, the vanilla and the cognac or rum to the mixture. Bring to a slow simmer and allow the sauce to thicken a bit.
When the sauce has thickened, remove it from the stove. Allow it to cool a bit before using it. Serve warm over ice cream. You may also pour it into a glass jar and seal with a lid and store in the refrigerator for a week or so. Remove the lid before carefully reheating in the microwave in 10 second bursts with stirring in between. It should take only 2 or 3 bursts before the sauce is pourable and warm.


